Setup Authentication
Proxy Authentication
Proxies can serve as access-control devices. HTTP defines a mechanism called proxy authentication that blocks requests for content until the user provides valid access-permission credentials to the proxy.
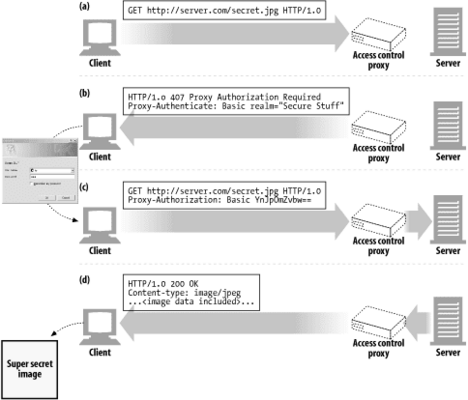
When a request for restricted content arrives at a proxy server, the proxy server can return a 407 Proxy Authorization Required status code demanding access credentials, accompanied by a Proxy-Authenticate header field that describes how to provide those credentials.
When the client receives the 407 response, it attempts to gather the required credentials, either from a local database or by prompting the user.
Once the credentials are obtained, the client resends the request, providing the required credentials in a Proxy-Authorization header field.
If the credentials are valid, the proxy passes the original request along the chain; otherwise, another 407 reply is sent.
There are 3 Ways how someone can Setup & use Authentication
SafeSquid Users
This is one of the simplest methods which one could use for authentication.
Firstly, SafeSquid needs to be installed and running on the machine.
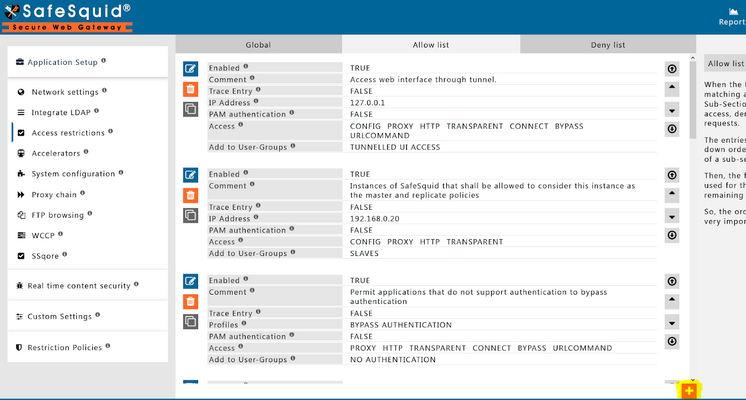
Now, navigating to http://safesquid.cfg/ in the web browser which has the SafeSquid machine proxy in it.
In this Web Page go to configure -> Access Restrictions -> Allow List and create your own policy by clicking on the orange '+' icon.
Now make sure that PAM Authentication is disabled and enter the required details. And it should look something like this:
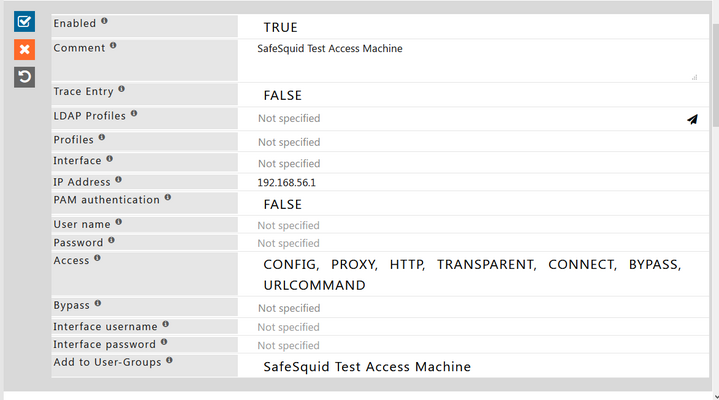
Now for the authentication purpose Simply add the username and password in the Username and Password Field.
As soon as you click on the save button it will show a prompt for username and password. Enter the credentials which you entered in the policy.
That's how easy it is to authenticate in SafeSquid.
Disadvantages:
- It has a few drawbacks of itself.
- It is not that secured since the password field is visible and the same password is set for all the users.
- Therefore, if you want to set different password then you must make new policy.
- Even though it is simple to configure it is an arduous work to manage it.
- It is suitable if the number of users is less than 10.
SafeSquid Linux Machine Users
For this principle you will be making the users in the Linux machine instead of making them in the configure page.
Firstly, go to the Linux machine where the safesquid is installed and create a new user in it by firing this command: useradd name_of_the_user.
Now, give the password to that user and to do that you write: passwd name_of_the_user. It will ask you for a new password (if the user is new) and you will again have to confirm it.

Now, navigating to http://safesquid.cfg/ in the web browser which has the safesquid machine proxy in it.
In this Web Page go to configure -> Access Restrictions -> Allow List and create your own policy by clicking on the orange '+' icon.
Now make sure that PAM Authentication is enabled and enter the required details. And it should look something like this:
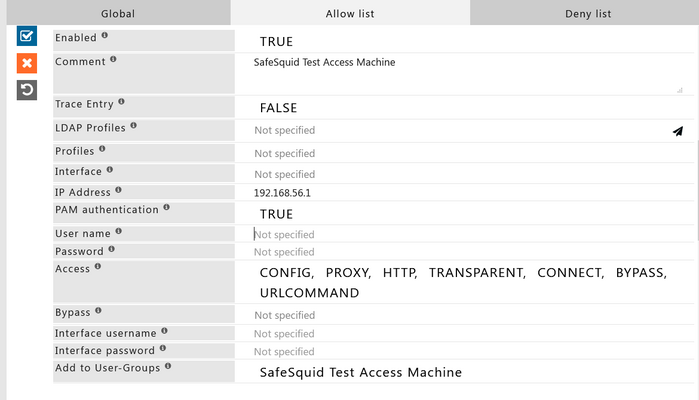
Now for the authentication purpose Simply add the username in the Username field.
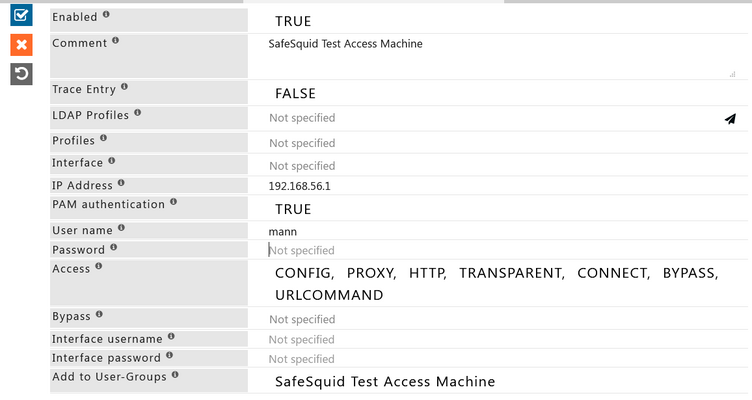
As soon as you click on the save button it will show a prompt for username and password. Enter the credentials which you entered in the linux machine.
That's how easy it is to authenticate in safesquid through creating user in linux machine and using PAM Authentication.
Disadvantage:
- Even though it is more secured then the SafeSquid User one it is still difficult to manage the users in the linux machine.
- It is suitable for small organizations.
Adding users using SafeSquid interface for authentication
If you do not have an Active Directory (AD) server to integrate with SafeSquid LDAP, but you want authenticate users by assigning usernames and passwords to your users.


